Home

How to make a super shiny mirror glaze cake, or entremet.
November 12th, 2018
A mirror glaze cake is a cake defined by its glossy coating called “mirror glaze” or a “glaçage miroir”. The mirror glaze can vary in color, sheen, and stylistic effects ranging from the “spider web” effect to the “galaxy mirror glaze”.
Most of the mirror glaze cakes you see are a form of French mousse cake called an entremet—not an American buttercream cake. While you certainly can turn your buttercream cake into a mirror glaze cake, it’s not the traditional application of mirror glaze. The textures just aren’t well-suited, but it will work as long as your frosted cake is perfectly smooth. And mirror glaze certainly tastes much better than fondant!
Entremets / Mirror Glaze Cakes typically feature:
The process is simple, but can take a while for the cakes to freeze, an important step in glazing your cake. You can only use mirror glaze on frozen cakes. Mirror glaze cakes also require some planning because you have to work “inside out” starting with the insert and ending with the outer mirror glaze. This tutorial will walk through the process of making a mirror glaze cake with my original recipe for mirror glaze.
If you are looking to jump right into making a mirror glaze cake, try one of these mirror glaze cake recipes:


The insert is what adds a diversity of flavors to the middle of your mirror glaze cake. Your insert can be anything! It can be a single layer or multiple layers. It's completely up to you.
The insert must then be frozen solid for inserting into the mirror glaze cake later. You will need a mold smaller than the entremet mold.
A common base is an almond dacquoise, but any traditional cake will work. If using a traditional cake like chiffon, genoise, or American sponge cake, you will have to slice thin layers because entremets tend to be smaller and flatter than frosted cakes.
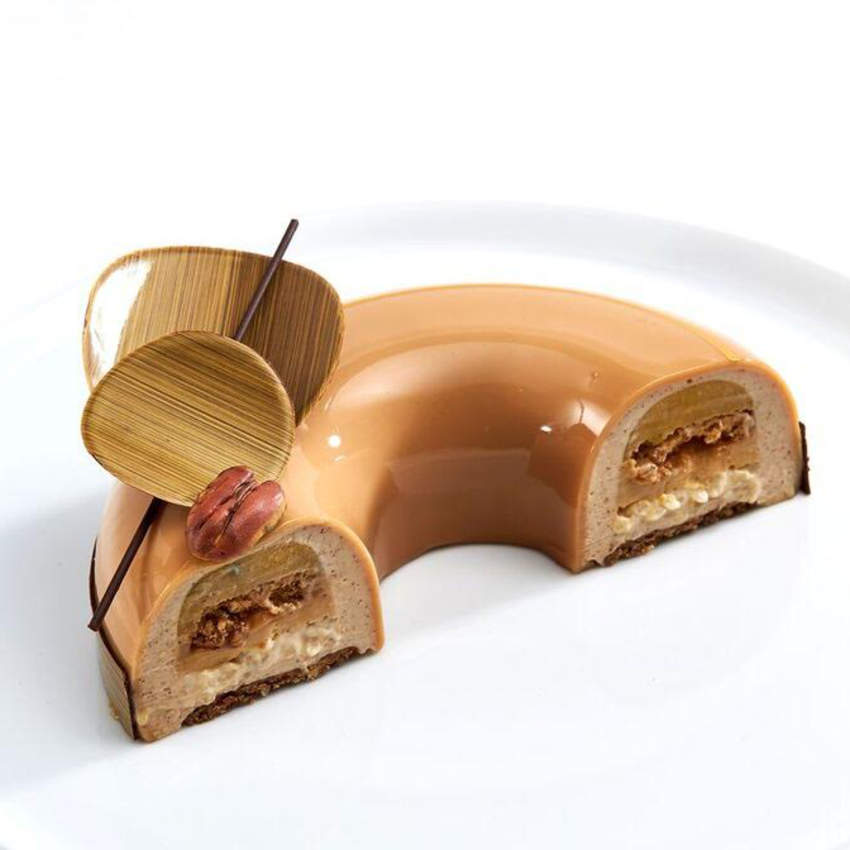
For this step you will need a mold to hold the mousse into the shape of your entremet. For a standard wide cylinder cake, you will need a ring mold. "Stone molds" for a disc-like shape are also a popular entremet shape. For a donut mirror glaze cake, you will need a two-part mold for the insert and the mousse.
Pipe half of the mousse into the mold. Then place the insert into the mousse and fill the entremet mold with the rest of the mousse. Finally top off with the cake base. Freeze the entremet overnight or at least four hours until frozen solid.


Pro Tip: If you are using a metallic ring mold and having a hard time unmolding the cake, you can use a pastry torch to briefly heat the outside so the cake slides out with ease.
Bloom the gelatin in 1/4 cup of cold water by quickly whisking it in and letting it sit. Set it aside while you heat the liquids.
Bring the water, sugar, and condensed milk to a gently simmer. Turn off the heat and stir the bloomed gelatin into the mixture. Pass this mixture through the sieve to remove any gelatin clumps.
Pour the mixture over the chocolate until it is fully melted. This should take about 5-10 minutes for all of the chocolate to fully melt. Use an immersion blender fully submerged into the liquid to avoid introducing any air bubbles. Blend this until the entire mixture is smooth and homogenous.
Allow the mirror glaze to cool to the target temperature, which is about 92°F (33°C). Make sure you stir periodically to prevent a film from forming on the top.
Pro Tip: Make sure your frozen cake has smooth edges. You should have no imperfections, holes, bumps, or rough edges. Because the mirror glaze cake should have shiny and reflective surfaces, just about any imperfection will show through the glaze.
When the glaze is between 90°F and 94°F (32°C - 34°C), it is ready to be poured over the cake. At this point be very careful not to introduce bubbles since the glaze is very viscous and they will not pop on their own. You must manually pop them or strain the mixture through a sieve.
Set your frozen cake on a glazing rack and smooth any imperfections you see with your hands.
Pro Tip: Always have an excess of glaze before pouring. There is nothing worse than getting to the end of your mirror glaze cake process and running out of glaze while pouring.
Allow the mirror glaze cake to fully gel before trying to move it. Use a spatula or a knife to lift it off of the rack and plate it.
Pro Tip: If you mess up on the pour, it's not the end of the world. Peel off the mirror glaze from the cake. Put the cake back in the freezer and re-heat the glaze to the target temperature to try again.
Pro Tip: Save excess glaze and store vacuum-sealed for a future mirror glaze cake.
For new recipes, techniques, and tutorials like this, subscribe to our mailing list and never miss a post.


